写作不易,Star是最大鼓励,感觉写的不错的可以给个Star⭐,请多多指教。本博客的Github地址。
[TOC]
之前简单总结过前端路由(hash路由)的实现,地址:前端路由实现。
在单页面应用中,前端路由并不陌生。单页面应用是指在浏览器中运行的应用,在使用期间页面不会重新加载。
基本原理:以hash形式(也可以使用History API来处理)为例,当url的hash发生改变时,触发hashchange注册的回调,回调中去进行不同的操作,进行不同内容的展示。
基于hash的前端路由优点是:能兼容低版本的浏览器。
history是HTML5才有的新API,可以用来操作浏览器的session history(会话历史)。
从性能和用户体验的层面来比较的话:
- 后端路由每次访问一个新页面的时候都要向服务器发送请求(每次请求都会返回一个新的html页面),然后服务器再响应请求,这个过程肯定会有延迟。
- 前端路由在访问一个新页面的时候仅仅是变换了一下路径而已,没有了网络延迟,对于用户体验来说会有相当大的提升。
基于hash的前端路由的实现
hash路由一个明显的标志是带有#,主要是通过监听url中的hash变化来进行路由跳转。
hash路由的优势就是:兼容性更好,在老版IE中都能运行。问题在于:url中一直存在#不够美观,而且hash路由更像是Hack而非标准,相信随着发展更加标准化的History API会逐步蚕食掉hash路由的市场。
demo
hash_router.html
<!DOCTYPE html>
<html>
<head>
    <meta charset="utf-8">
    <meta http-equiv="X-UA-Compatible" content="IE=edge">
    <title>hash路由实现</title>
    <style type="text/css">
        * {
            margin: 0;
            padding:0;
        }
        a {
            list-style: none;
            text-decoration: none;
            color: #fff;
        }
        ul {
            width: 500px;
            margin: 100px auto;
        }
        li {
            padding:5px;
            display: inline-block;
            background-color: #000;
        }
    </style>
</head>
<body>
<ul>
    <li><a href="#/">turn blue</a></li>
    <li><a href="#/red">turn red</a></li>
    <li><a href="#/yellow">turn yellow</a></li>
</ul>
<button>back</button>
<script type="text/javascript" src="h5router.js"></script>
</body>
</html>
2
3
4
5
6
7
8
9
10
11
12
13
14
15
16
17
18
19
20
21
22
23
24
25
26
27
28
29
30
31
32
33
34
35
36
37
router.js:
/**
 * hash路由的简单实现
 * 实现了路由的简单切换
 * @class Routers
 */
class Routers {
    constructor() {
        this.routes = {}; // 以键值对的形式存储路由
        this.currentUrl = ''; // 当前路由的url
        this.refresh = this.refresh.bind(this);
        window.addEventListener('load', this.refresh, false);
        window.addEventListener('hashchange', this.refresh, false);
    }
    // 存储路由的hash及其对应的callback函数
    route(path, callback) {
        this.routes[path] = callback || function() {};
    }
    // 触发路由hash变化时,执行对应的callback函数
    refresh() {
        // 获取当前的hash值
        this.currentUrl = location.hash.slice(1) || '/';
        // 调用当前的hash值所对应的callback函数
        this.routes[this.currentUrl]();
    }
}

// 初始化一个路由
window.Router = new Routers();
const content = document.querySelector('body');
function changeBgColor(color) {
    content.style.backgroundColor = color;
}

Router.route('/', () => {
    changeBgColor('blue');
});
Router.route('/red', () => {
    changeBgColor('red');
});
Router.route('/yellow', () => {
    changeBgColor('yellow');
});
2
3
4
5
6
7
8
9
10
11
12
13
14
15
16
17
18
19
20
21
22
23
24
25
26
27
28
29
30
31
32
33
34
35
36
37
38
39
40
41
42
增加后退功能
router2.js:增加后退功能
/**
 * hash路由的简单实现
 * 实现了路由的简单切换
 * 增加前进和回退功能
 * @class Routers
 */
class Routers {
    constructor() {
        this.routes = {}; // 以键值对的形式存储路由
        this.currentUrl = ''; // 当前路由的url
        this.history = []; // 记录出现过的hash
        this.isBack = false; // 默认不是后退操作
        this.currentIndex = this.history.length - 1;
        this.backOff = this.backOff.bind(this);
        this.refresh = this.refresh.bind(this);
        window.addEventListener('load', this.refresh, false);
        window.addEventListener('hashchange', this.refresh, false);
    }
    // 存储路由的hash及其对应的callback函数
    route(path, callback) {
        this.routes[path] = callback || function() {};
    }
    // 触发路由hash变化时,执行对应的callback函数
    refresh() {
        // 获取当前的hash值
        this.currentUrl = location.hash.slice(1) || '/';
        if (!this.isBack) {
            // if (this.currentIndex < this.history.length - 1) {
            //     this.history = this.history.slice(0, this.currentIndex + 1);
            // }
            this.history.push(this.currentUrl);
            this.currentIndex++;
        }
        // 调用当前的hash值所对应的callback函数
        this.routes[this.currentUrl]();
        console.log('指针:', this.currentIndex, 'history:', this.history);
        this.isBack = false;
    }
    // 后退功能
    backOff() {
        this.isBack = true;
        this.currentIndex <= 0 ? (this.currentIndex = 0) : (this.currentIndex = this.currentIndex - 1);
        // 设置当前url的hash
        location.hash = `#${this.history[this.currentIndex]}`;
        // 执行当前hash对应的回调函数
        // this.routes[this.history[this.currentIndex]]();
    }
}

// 初始化一个路由
window.Router = new Routers();
const content = document.querySelector('body');
const button = document.querySelector('button');
button.addEventListener('click', Router.backOff, false);
function changeBgColor(color) {
    content.style.backgroundColor = color;
}

Router.route('/', () => {
    changeBgColor('blue');
});
Router.route('/red', () => {
    changeBgColor('red');
});
Router.route('/yellow', () => {
    changeBgColor('yellow');
});
2
3
4
5
6
7
8
9
10
11
12
13
14
15
16
17
18
19
20
21
22
23
24
25
26
27
28
29
30
31
32
33
34
35
36
37
38
39
40
41
42
43
44
45
46
47
48
49
50
51
52
53
54
55
56
57
58
59
60
61
62
63
64
65
66
67
HTML5新路由方案
History API

相关Api:
- 后退:window.history.back();
- 前进:window.history.forward();
- 后退三个页面:window.history.go(-3);
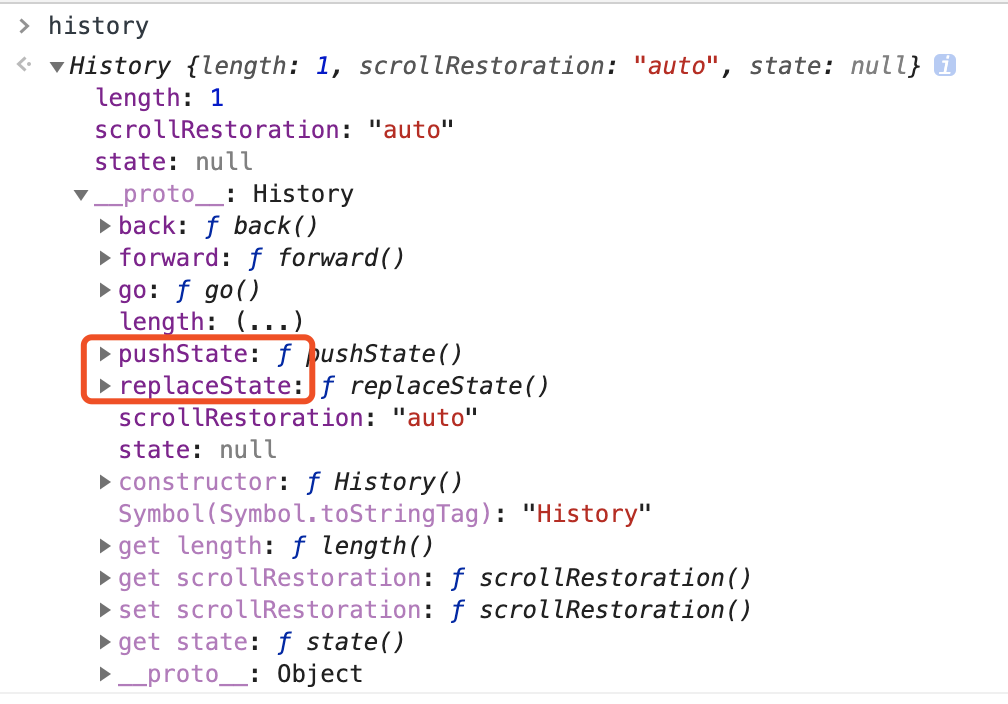
history.pushState方法用于在浏览历史中添加历史记录,但是并不触发跳转,该方法接受三个参数,依次为:
- state:一个与指定网址相关的状态对象,
popstate事件触发时,该对象会传入回调函数。如果不需要这个对象,此处可以填null; - title:新页面的标题,但是所有浏览器目前都忽略这个值,因此这里可以填
null; - url:新的网址,必须与当前页面处在同一个域。浏览器的地址栏将显示这个网址。
history.replaceState方法的参数与pushState方法一模一样,区别是:它修改浏览历史中当前纪录,而非添加记录,同样不触发跳转。
demo
h5_router.html
<!DOCTYPE html>
<html>
<head>
    <meta charset="utf-8">
    <meta http-equiv="X-UA-Compatible" content="IE=edge">
    <title>history路由实现</title>
    <style type="text/css">
        * {
            margin: 0;
            padding:0;
        }
        a {
            list-style: none;
            text-decoration: none;
            color: #fff;
        }
        ul {
            width: 500px;
            margin: 100px auto;
        }
        li {
            padding:5px;
            display: inline-block;
            background-color: #000;
        }
    </style>
</head>
<body>
<ul>
    <li><a href="/">turn blue</a></li>
    <li><a href="/red">turn red</a></li>
    <li><a href="/yellow">turn yellow</a></li>
</ul>
<button>back</button>
<script type="text/javascript" src="h5router.js"></script>
</body>
</html>
2
3
4
5
6
7
8
9
10
11
12
13
14
15
16
17
18
19
20
21
22
23
24
25
26
27
28
29
30
31
32
33
34
35
36
37
./static/h5router.js
class Routers {
    constructor() {
        this.routes = {};
        // 初始化时监听popstate事件
        this._bindPopState();
    }
    // 初始化路由
    init(path) {
        history.replaceState({path: path}, null, path);
        this.routes[path] && this.routes[path]();
    }
    // 将路径和其对应的回调函数加入hashMap存储
    route(path, callback) {
        this.routes[path] = callback || function() {};
    }
    // 进行路由之间的跳转并触发路由对应的回调
    go(path) {
        history.pushState({path: path}, null, path);
        // console.log(this.routes);
        this.routes[path] && this.routes[path]();
    }
    // 监听popState事件
    _bindPopState() {
        window.addEventListener('popstate', e => {
            const path = e.state && e.state.path;
            this.routes[path] && this.routes[path]();
        });
    }
}

window.Router = new Routers();
Router.init(location.pathname);
const content = document.querySelector('body');
const ul = document.querySelector('ul');
function changeBgColor(color) {
    content.style.backgroundColor = color;
}

Router.route('/', () => {
    changeBgColor('blue');
});
Router.route('/red', () => {
    changeBgColor('red');
});
Router.route('/yellow', () => {
    changeBgColor('yellow');
});
ul.addEventListener('click', e => {
    if (e.target.tagName === 'A') {
        e.preventDefault();
        Router.go(e.target.getAttribute('href'));
    }
});
2
3
4
5
6
7
8
9
10
11
12
13
14
15
16
17
18
19
20
21
22
23
24
25
26
27
28
29
30
31
32
33
34
35
36
37
38
39
40
41
42
43
44
45
46
47
48
49
50
51
52
53
server.js
const Koa = require('koa');
const path = require('path');
const fs = require('fs.promised');
const static = require('koa-static');
const app = new Koa();

const main = async (ctx, next) => {
    ctx.type = 'html';
    ctx.body = await fs.readFile('./h5_router.html', 'utf8');
}
app.use(static(path.join(__dirname + '/static')));
app.use(main);

app.listen(8090, () => {
    console.log('server is start at 8090');
});
2
3
4
5
6
7
8
9
10
11
12
13
14
15
16
执行
node server.js,访问localhost:8090即可。
坑点总结
Uncaught SyntaxError: Unexpected token <
在实现history路由的过程中,自己用Koa启了一个本地的server。在进行页面访问时遇到了如下问题:
原本我的js文件和html文件是放在一个同级目录下的,koa貌似需要把js文件放入到static目录下,然后我把js文件放入到static目录下,并引入了koa处理静态文件的中间件koa-static,问题就解决了。